

How to Make Unvisualised
Created on 21 June 2024
For this effect, you will need a latest version of Avidemux installed, and Audacity running on your operating system in order to achieve the video effect. You will also need a "Frequency Shifter" plugin from the Full Bucket website to achieve the audio effect.
Step 1: Clip Preparation
Open up Avidemux on your screen, and you are required to set a video output, the audio output, and the format output before opening your desired video. Here's the example below if you're slightly confused by what I mean here:
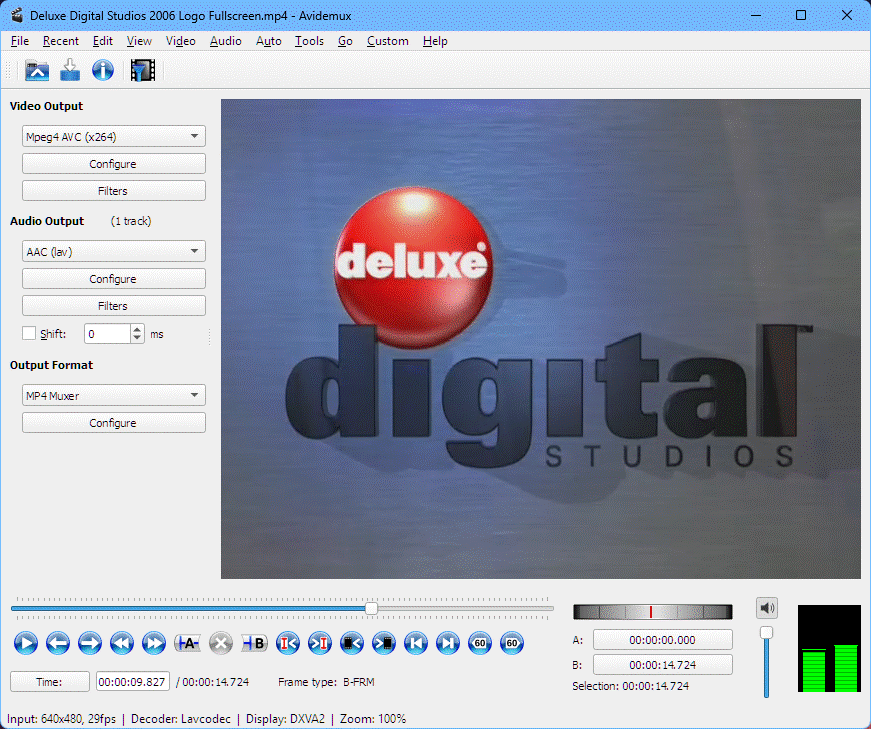
The configuration of the output settings on Avidemux
Step 2: Removing the Luminance Plane
On the top of the window, hover the video option and you should see the filters button so you can tap on it, as the video filter manager dialog appears. On the "Colours" category, click on a filter where it allows you to remove a certain plane. While you only keep both the U and V planes, get rid of the Y plane by unchecking the box above, and just preview for the result. Here's the showcase:
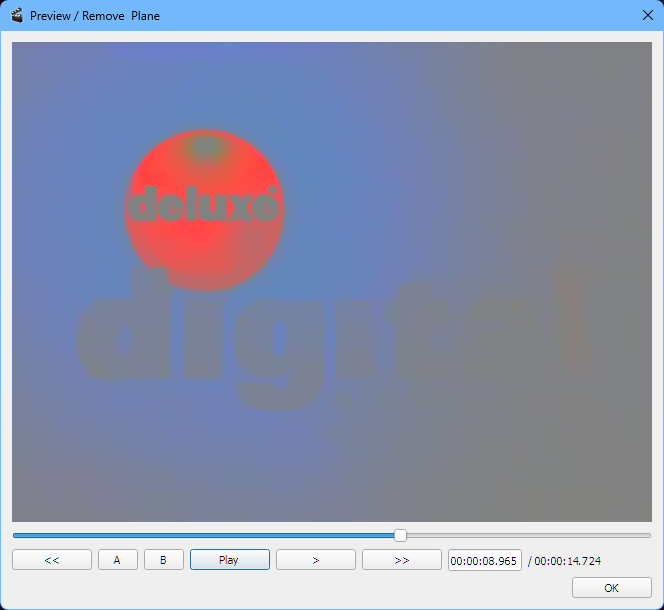
The Deluxe Digital Studios logo, with the Y plane removed while only the U and V planes were kept alone
Step 3: Exporting the Edited Video
Once you have achieved the video effect, you simply save your edit in your files by giving a file a name first or selecting a file to overwrite with (not recommended).
Step 4: Launching the Audio Editor and Getting Started
Open Audacity and import your file of your choice like you did in Avidemux, it could be an audio file or a video file (if you have integrated the external FFmpeg library which the audio software detects it).
Step 5: Apply the Audio Effect
Open up the Full Bucket Frequency Shifter plugin, and adjust the audio signal's spectrum like this:
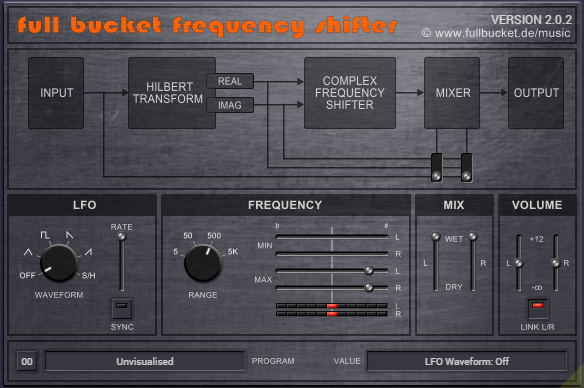
Incase if you are confusing and wasting your time to get it perfect, the preset file is provided to download below:
Now, apply the audio effect and play the audio for accurate results before exporting it into your files on your desktop.
Step 6: Merging the Files Altogether
You would use any video editor, like Kdenlive to merge both the audio effect and the video effect output files to match the result and you would render it and it will go straight to your files.
Step 7: Preview and Upload
When you are done rendering the output result, preview your video and upload it to YouTube, Dailymotion, Vimeo, Odysee, Rumble, VidLii, or any other video hosting website you want to put there.